Connect WooCommerce to Vio
Sell your WooCommerce catalogue through Vio in a few minutes — no code required. This guide covers installing the Vio Sync for WooCommerce plugin, connecting your store, syncing your products, and receiving orders back.
Who this is for — WooCommerce store owners and partners who want their products available in Vio. You’ll do everything from your WordPress admin and the Vio dashboard.
Before you start
Make sure you have:
- A WordPress site with WooCommerce installed and active.
- A Vio API key — your Vio contact provides this for your store.
- At least one published product in your store (you need products to sync).
How it works
Once you connect your store, Vio keeps your catalogue in sync and delivers your orders back:
- Your catalogue syncs to Vio — titles, prices, stock, variants and images.
- Your products become available in Vio’s mobile apps and live-shopping channels.
- When a shopper places an order, it’s delivered straight to your WooCommerce store.
Step 1 · Install the plugin
Find the plugin
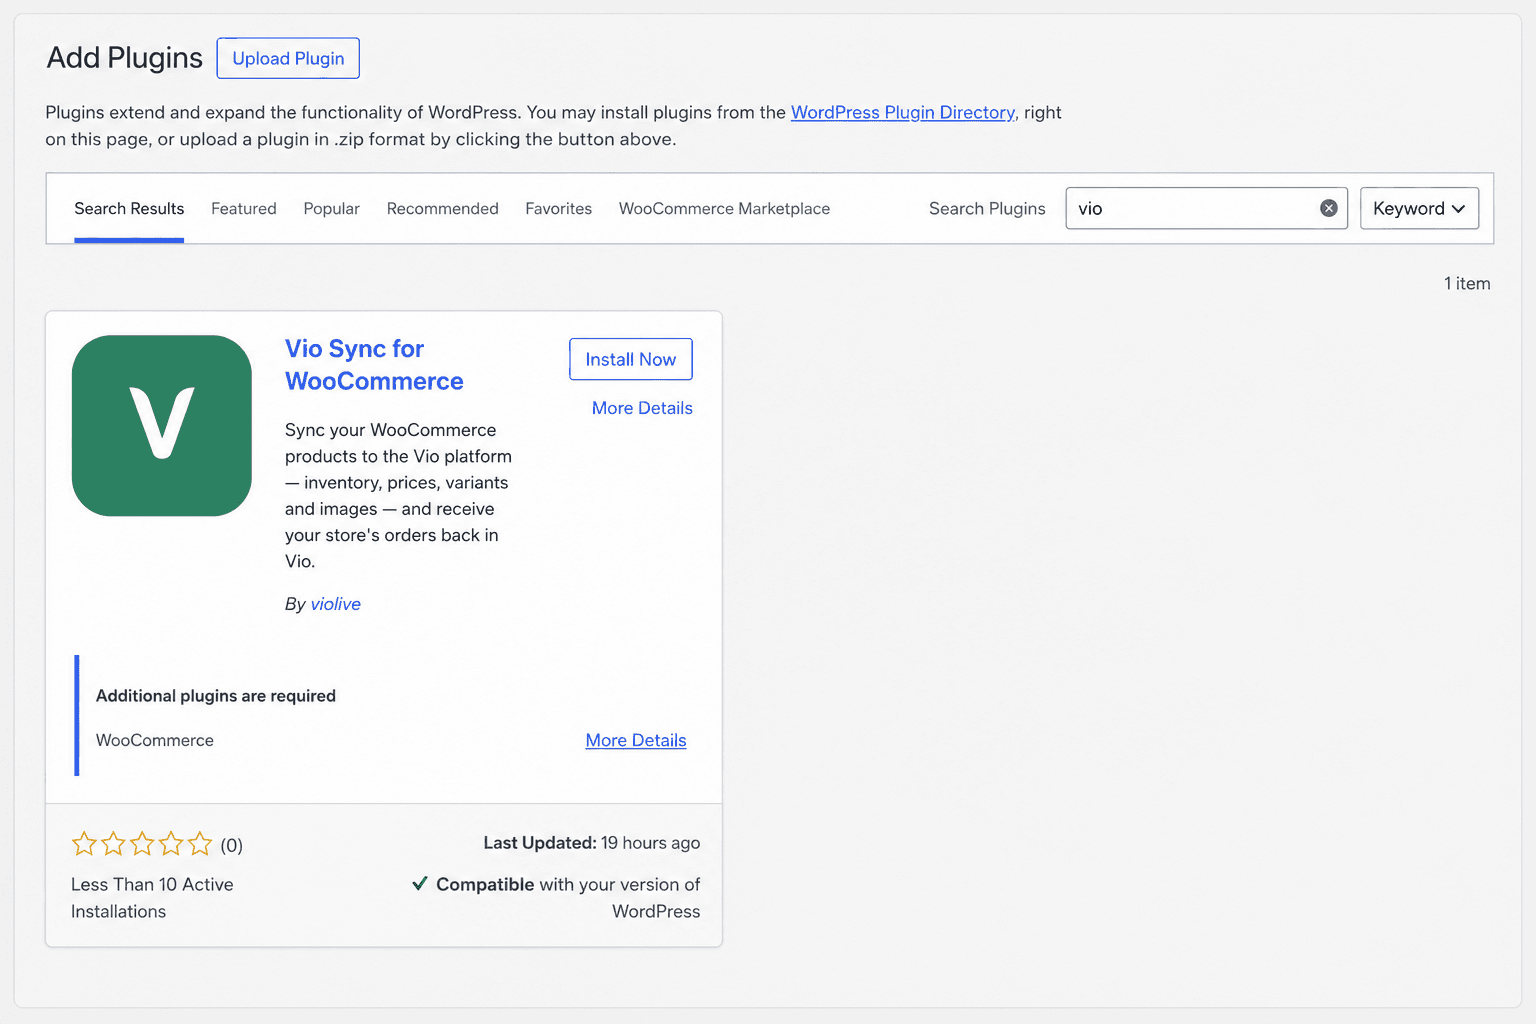
In your WordPress admin, go to Plugins → Add New and search for Vio Sync for WooCommerce.
Install and activate
Click Install Now, then Activate. A new Vio menu appears in your WordPress sidebar.
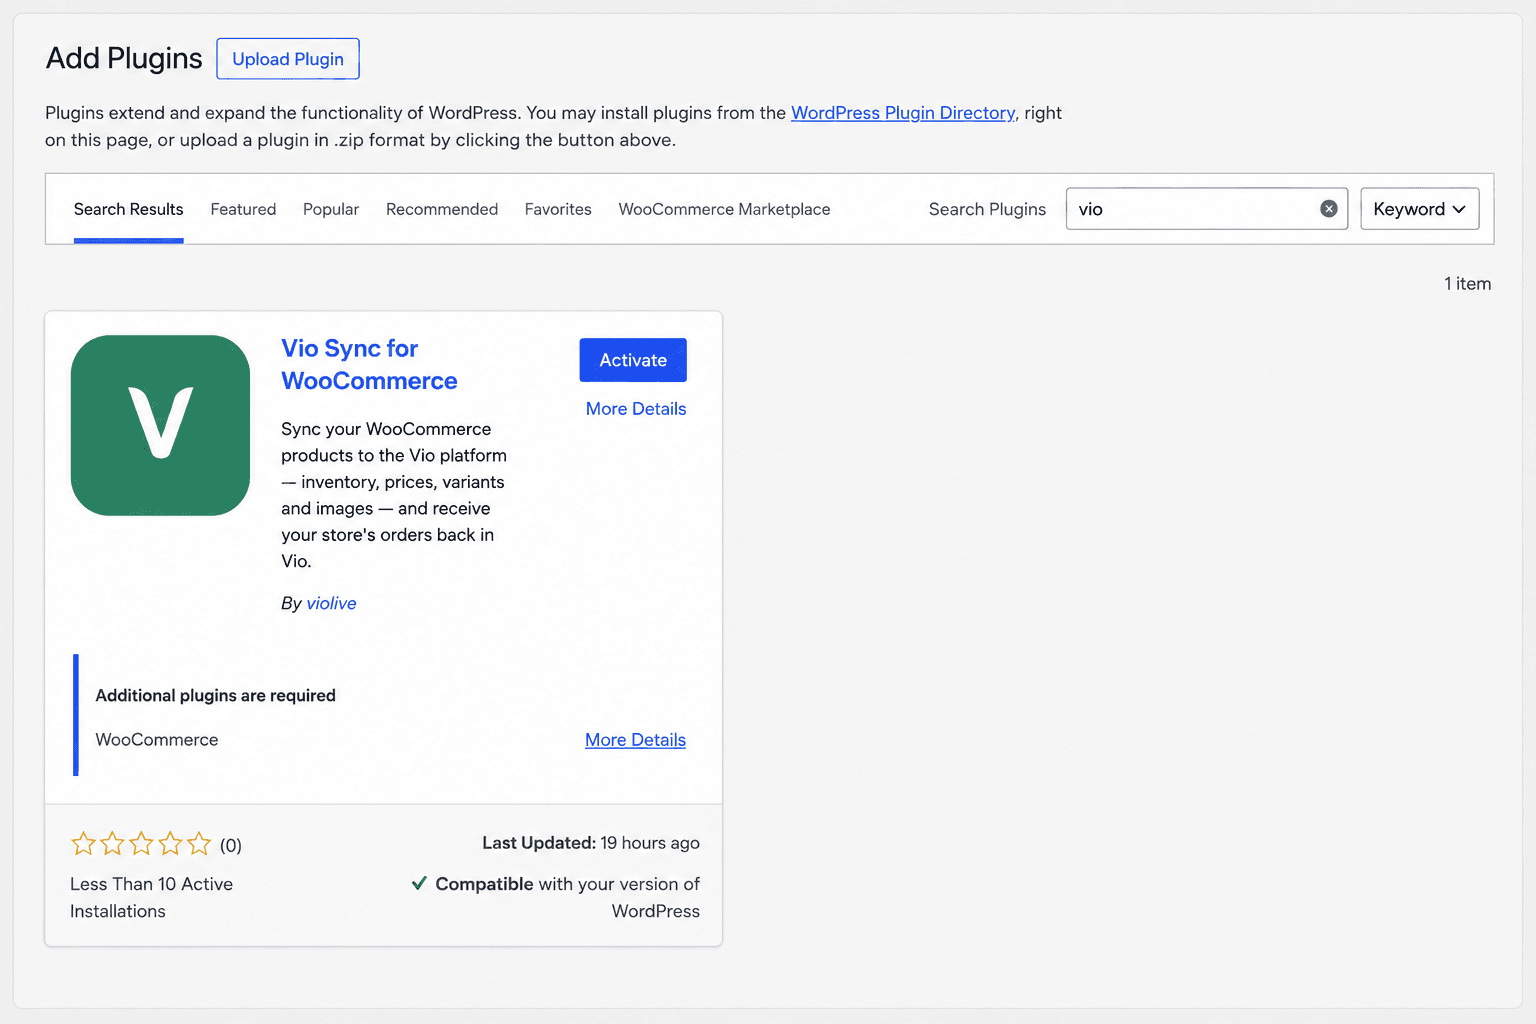
Finding Vio Sync for WooCommerce in Plugins → Add New and installing it.
Step 2 · Get your Vio API key
Vio provides your API key. Your Vio contact sends you the key for your store — you don’t need to create it yourself.
Don’t have your API key yet? Contact the Vio team and we’ll set you up.
Keep your API key private — it links your store to your Vio account. Treat it like a password.
Step 3 · Connect your store
Open the Vio settings
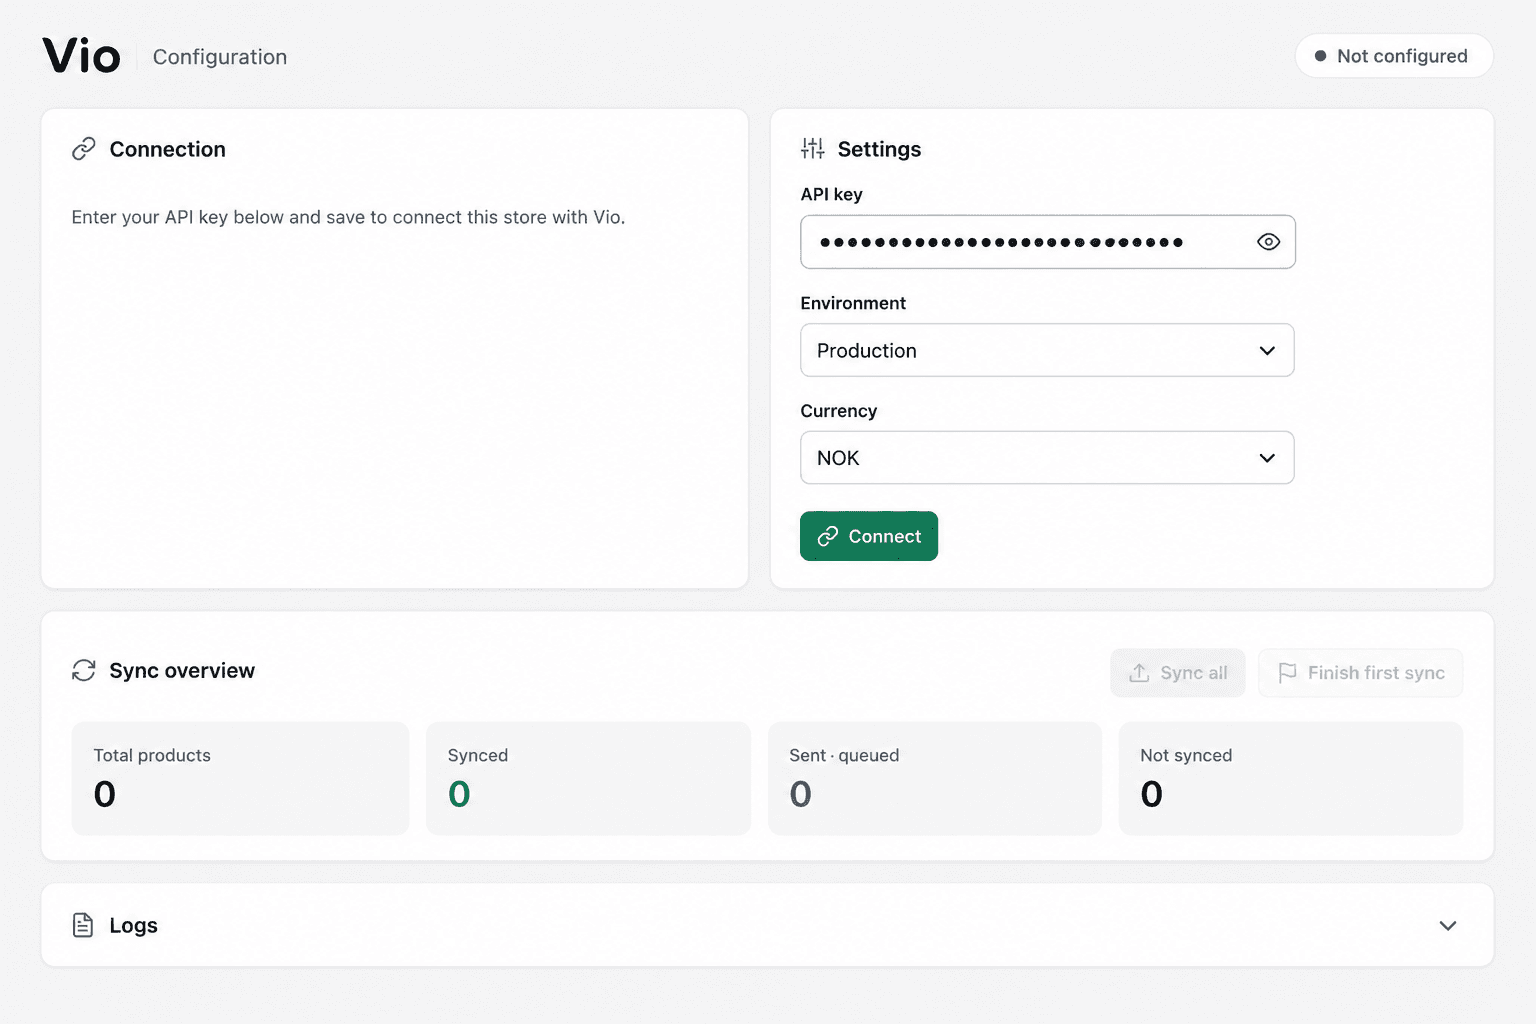
In WordPress, click the Vio menu to open the connection screen.
Enter your details
- Paste your API key.
- Choose your environment — Production, or Staging to test first.
- Pick your currency.
Then click Connect.
Approve the connection
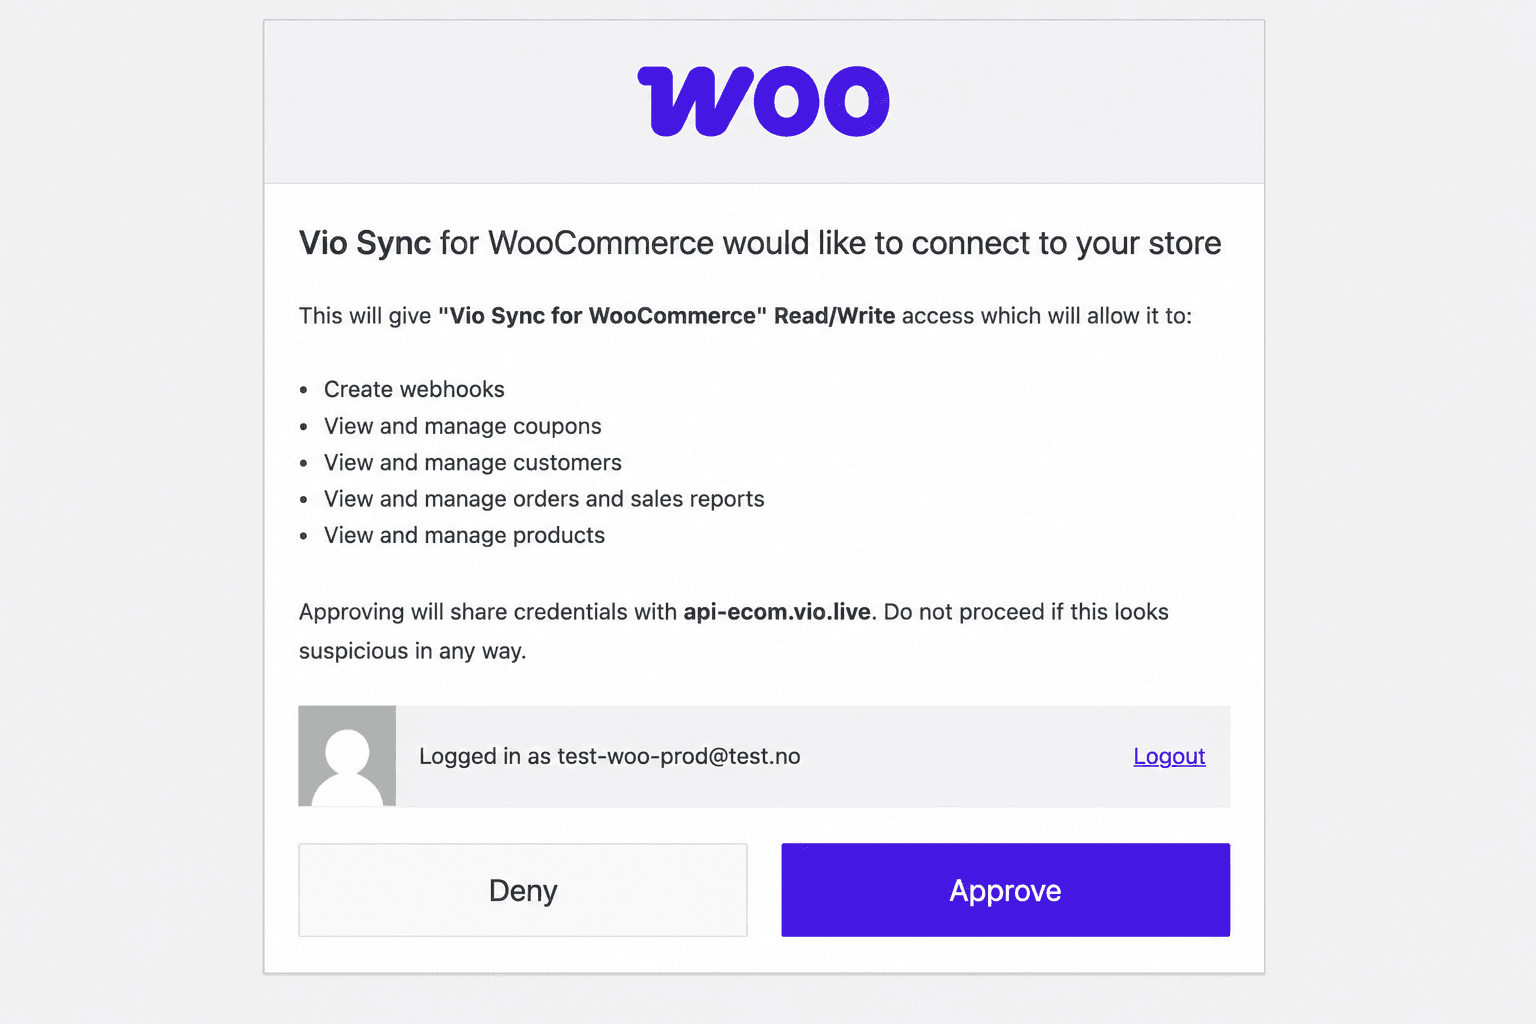
WooCommerce shows an authorization screen — click Approve to let Vio connect to your store.
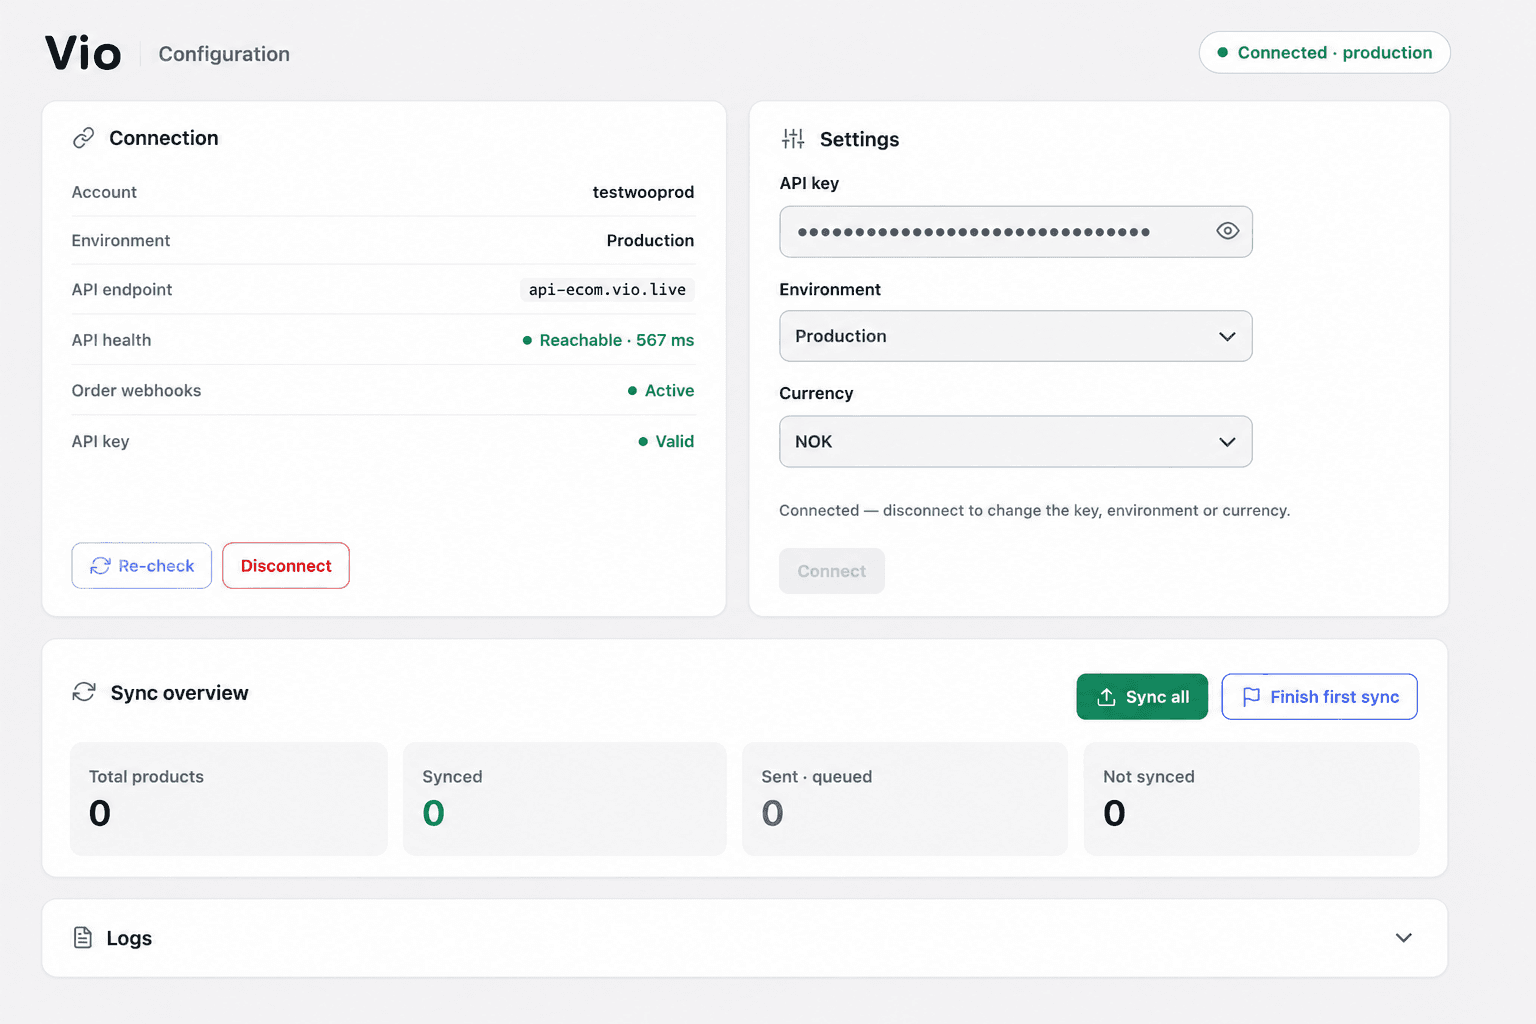
Once connected, the Vio screen shows Connected, with your account, a Reachable API status, and Active order webhooks.
Step 4 · Sync your products
On the Vio screen, click Sync all to push your whole catalogue to Vio. You can also sync selected products from Products → All Products using the Sync bulk action.
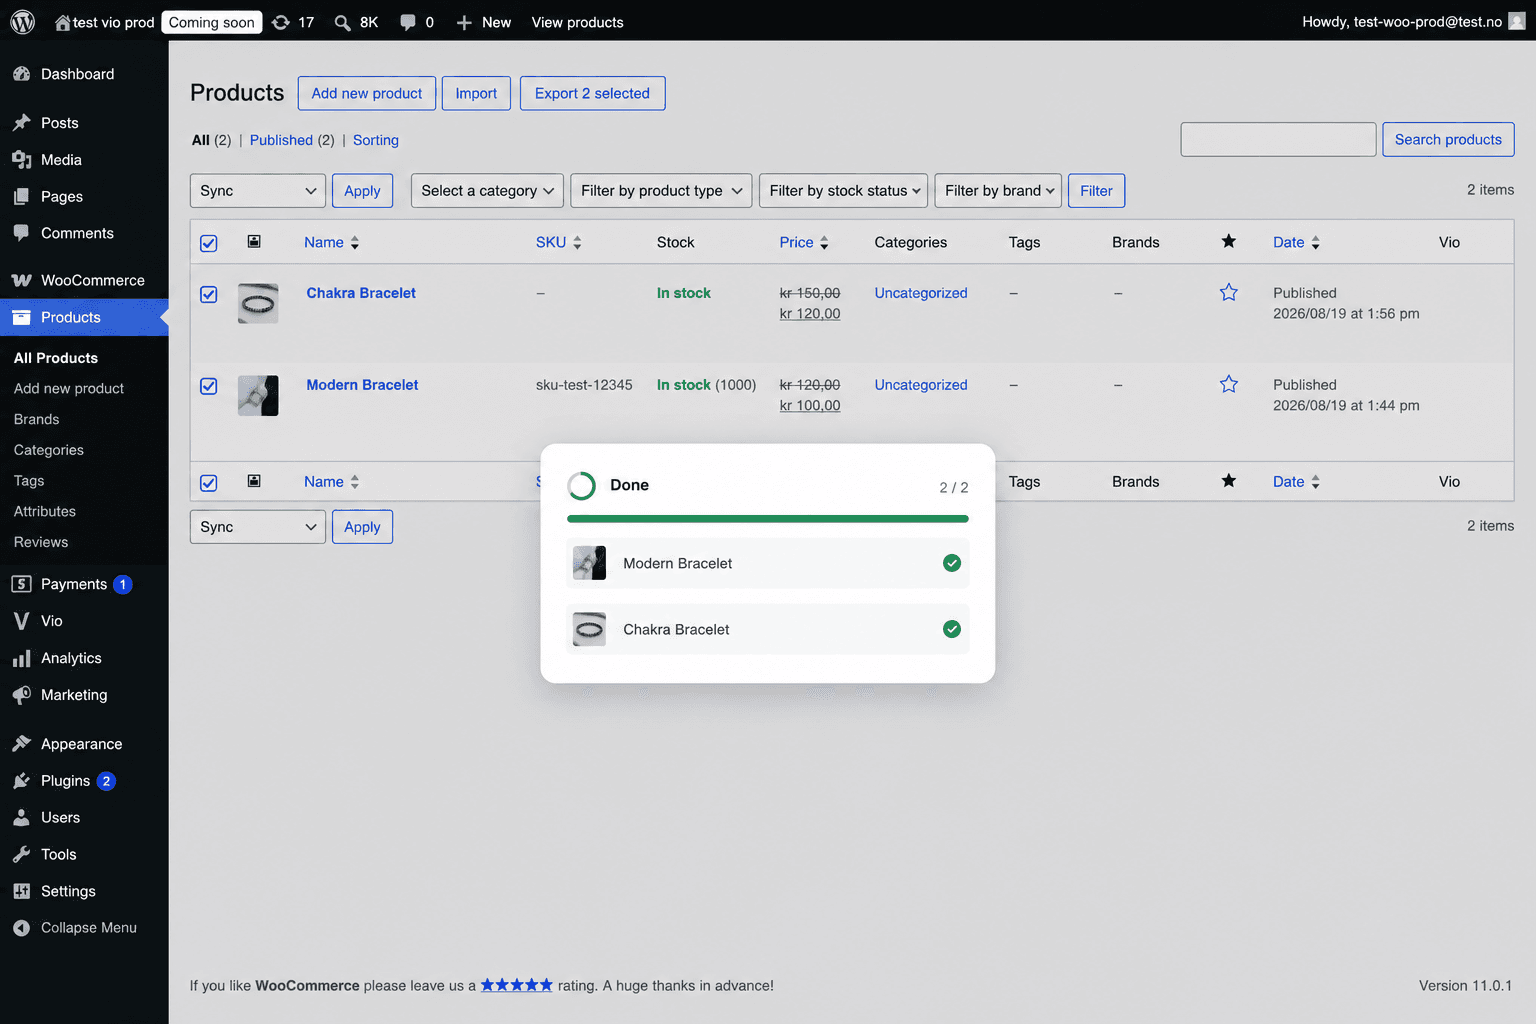
Each synced product shows a green ✓ Synced status in the Vio column of your product list.
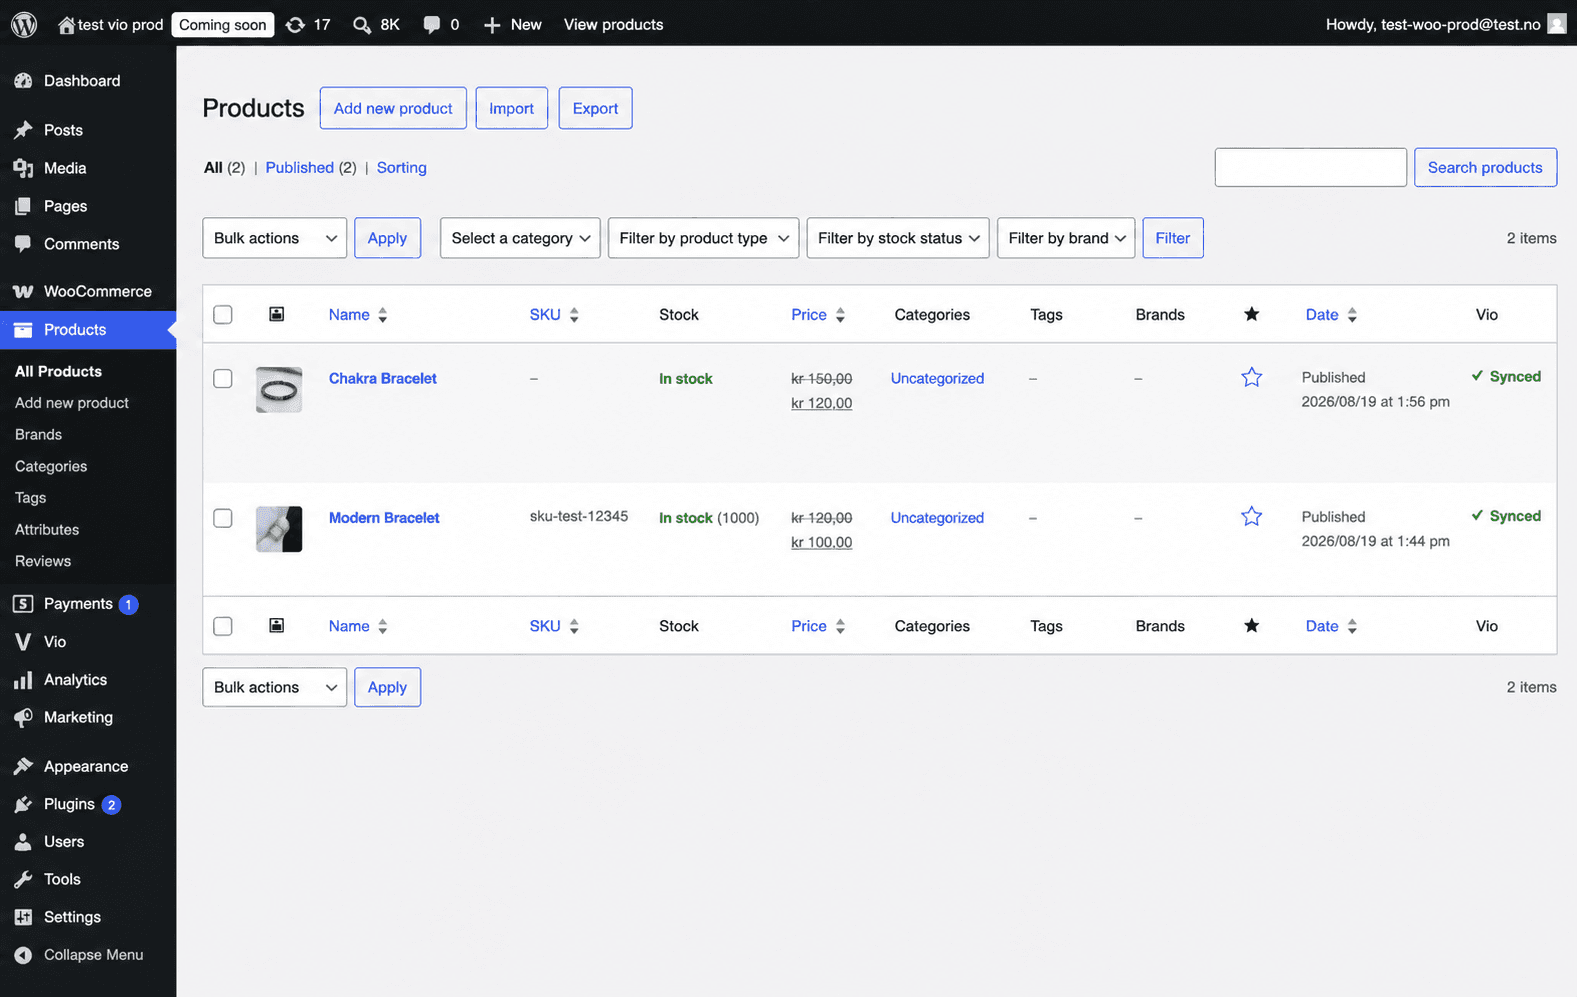
The sync in action — clicking Sync all, the progress bar, and each product turning to ✓ Synced.
What syncs: title, description, price, stock, SKU, barcode, variants and attributes, and image URLs. When you edit a product in WooCommerce, it re-syncs automatically on save.
Step 5 · Receiving orders
Orders placed through Vio are delivered to your WooCommerce store automatically — they appear in WooCommerce → Orders like any other order. There’s no extra setup: the plugin registers the order webhooks for you during connection.
Managing your catalogue
From Products → All Products, select products and use the Bulk actions:
| Action | What it does |
|---|---|
| Sync | Push the selected products to Vio. |
| Unsync | Remove the link to Vio, but keep the product in your store. |
| Delete from Vio | Remove the product from Vio. |
The Vio column shows each product’s status at a glance, and products you edit re-sync automatically on save.
Disconnecting
To disconnect, open the Vio menu and click Disconnect. This removes the API key, the WooCommerce REST keys and the order webhooks from your store. You can optionally also delete the products Vio had synced.
Troubleshooting
“Not connected” or the key is rejected — double-check the API key and that you selected the right environment (Production vs Staging). Use Re-check on the Vio screen.
Products don’t sync — make sure they’re Published (drafts don’t sync) and that your store shows Connected. Then run Sync all again.
Orders don’t arrive — confirm Order webhooks show Active on the Vio screen. If they don’t, disconnect and reconnect.
Need help?
Contact the Vio team at vio.live — we’re happy to help you get set up.